Rear Bearing installation 2018 Yaris

August 14th, 2023
Rear Bearing installation 2018 Yaris Fig. 1

Rear Bearing installation 2018 Yaris

August 14th, 2023
Rear Bearing installation 2018 Yaris Fig. 2

Rear Bearing installation 2018 Yaris

August 14th, 2023
Rear Bearing installation 2018 Yaris Fig. 3

Rear Bearing installation 2018 Yaris

August 14th, 2023
Rear Bearing installation 2018 Yaris Fig. 4

Rear Bearing installation 2018 Yaris

August 14th, 2023
Rear Bearing installation 2018 Yaris Fig. 5
Share:

Despite the fact that wheel bearing replacement is a relatively common task within the workshop, there is still some confusion among technicians between the different wheel bearing technologies and the fitting procedures that need to be followed to install them correctly. Dayco has produced a step-by-step guide to correctly install the rear wheel bearings on the popular 2018 Toyota Yaris (P13).


Before starting the replacement process, it is advisable to check the brake system for fault codes, using a suitable diagnostic tool, and to re-check the system once the job has been completed. In addition, if a bearing replacement requires the removal of any of the vehicle’s steering & suspension components, it’s also recommended that the steering geometry is also assessed after the work has been carried out.

Raise the vehicle on a lift and remove the rear wheels. With the handbrake released, use two screws to help remove the brake drum (Fig. 1). If this proves difficult, loosen the handbrake cable to ensure that the brake shoes are well away from the inner surface of the drum. Disconnect the electrical connector for the wheel speed sensor.

This rear wheel bearing is a Generation 3 design, and secured in position on the wheel carrier assembly with four bolts, which now need to be removed (Fig. 2), to allow the bearing/hub assembly to be taken off (Fig. 3).

Before replacing the wheel bearing from the Dayco kit (KWD1070), it might be necessary to clean the bearing mounting surface on the assembly to ensure it fits correctly and sits true, when secured in position with the new bolts, which are also supplied in the kit and must be torqued to 90 Nm (Fig. 4).

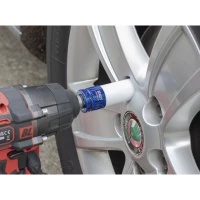
Re-attach the brake drum and reconnect the wheel speed sensor before refitting the wheel and tightening the wheel bolts to 103 Nm (Fig. 5). Remember to retighten and, if necessary, adjust the handbrake to ensure its correct operation.

Naturally, before returning the car to the owner, always carry out a road test to ensure the job has been completed successfully, that the braking system is working effectively and that no ABS warning lights show an alert message on the dashboard.

Please note, whenever replacing wheel bearings, the vehicle manufacturer’s specified torque values must be applied to all the relevant fixings and always replace any bolts that are for one use only.

To further assist technicians to fit replacement wheel bearings correctly and efficiently, Dayco has produced several installation videos on their YouTube Channel , alongside their step-by-step guides.

To read more of this technical article or download the entire article click here.

There are lots more Tech Tips to view, and they are all searchable, on TechTips.ie.
PREVIOUS ARTICLE
New concept shows Opel future direction
NEXT ARTICLE
Get to grips with ADAS

More from AFTERMARKET

More from AUTOBIZ