In this Schaeffler LuK clutch feature, REPXPERT Alistair Mason is giving some valuable information on clutch and dual mass flywheel replacements for Opel Vivaro and Movano vans. This information also covers some Fiat, Mercedes, Nissan and Renaults. REPXPERT receives a lot of technical phone calls and warranty enquiries relating to the clutch and dual mass flywheel products on these vehicles. With a little guidance most of these can be eliminated.
The first step is organizing the correct parts. The following information will help the parts supplier identify the correct parts:
- Is the vehicle front or rear wheel drive
- Date of construction
- Engine serial number
This information is available on Schaeffler REPXPERT and also on
the REPXPERT website.
Then you can focus on the repair. The easiest and advised method of gearbox removal is to remove the front subframe, this gives more space and visibility for a successful clutch and DMF replacement.
Dual Mass Flywheel Replacement On the 1.6 dCi engine, the flywheel has a timed sensor ring for the engine speed and position. This flywheel can fit in one of eight positions, and only one is correct. When fitting the flywheel, the small hole in the Dual Mass Flywheel (DMF) must align with the small drilling in the crankshaft, or the vehicle will not start (
Figs 1 and 2). This service information is attached to the part on REPXPERT.
The 2.0 litre variants generally have a solid flywheel.
When bolting the DMF to the crankshaft, the bolts must be tightened and torqued in an even and sequential manner, to eliminate the risk of buckle, or tilt to the flywheel.
Clutch replacement Apply a light smear of high melting point grease to the gearbox input shaft and insert the clutch plate. This will ensure the clutch is correct for the application, and also evenly distributes the grease on the shaft. Remove the clutch plate and remove any excess grease.
Always use a clutch alignment tool. Where the vehicle is fitted with a Self-Adjusting Clutch (SAC), always use a self-adjusting clutch tool (
Fig 3) to eliminate any risk of judder, and unintended clutch adjustment. This also removes the risk of stripping threads in the new DMF.
Concentric Slave Cylinder (CSC) replacement There are generally two variants of CSCs for these vehicles. They have either a two or three bolt fixing CSC. The two bolt fixing CSC can come with an option of connector pipes. It is very important to select and mount the correct pipe before refitting the gearbox (
Fig 4).
The CSC can be difficult to bleed after replacement, a “top tip” is to pre-fill the CSC with new, and the correct grade of clutch fluid, prior to fitment. Place a rag over the pipe during gearbox fitment, as some fluid will be expelled.
Never dry squeeze a new CSC, as this can cause internal damage. Always flush the old clutch fluid from the reservoir and master cylinder through the pipe to a drainer, to prevent contamination of the new CSC seal.
Gearbox installation Prior to installing the gearbox, ensure that all the alignment dowels are installed in the gearbox correctly, and clean up if required (
Fig 5). These can be a tight fit, and are known to crush if not fully aligned, leading to misalignment issues that can cause DMF centre bearing failure.
Using a transmission jack, bring the gearbox close to the engine. Spend a little time aligning the gearbox to the engine, and then ease the gearbox into position and onto the dowels. Do not force the gearbox onto the dowels, or draw the gearbox on using the bell-housing bolts.
Final checks When the repair is complete, always carry out a diagnostic check on the engine. Any fault on the engine can lead to a premature DMF failure.
Information on Schaeffler products, fitting instructions, labour times and much more can be found on the REPXPERT workshop portal - www.repxpert.co.uk - the REPXPERT app, or by calling the Schaeffler REPXPERT hotline on (+44) 1432 265 265.
To read more of this technical article or download the entire article click
here. There are lots more Tech Tips to view, and they are all searchable, on
TechTips.ie.
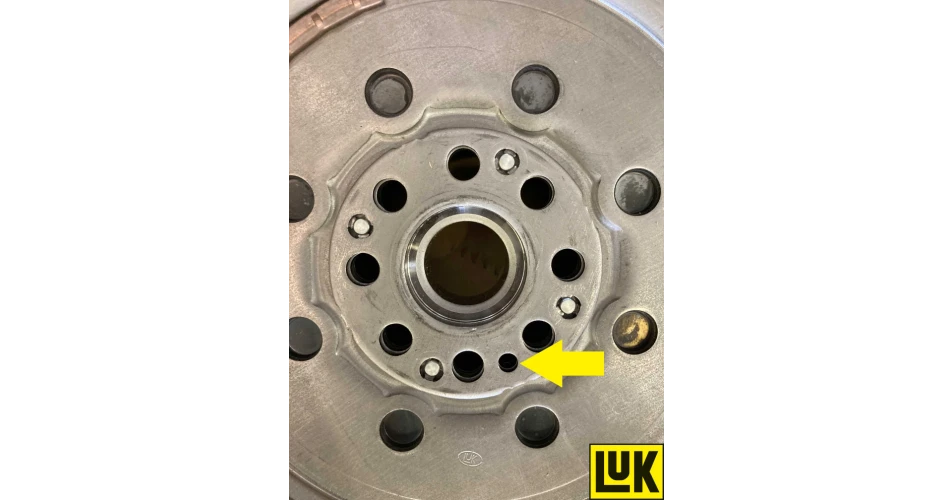 Fig 1
Fig 1
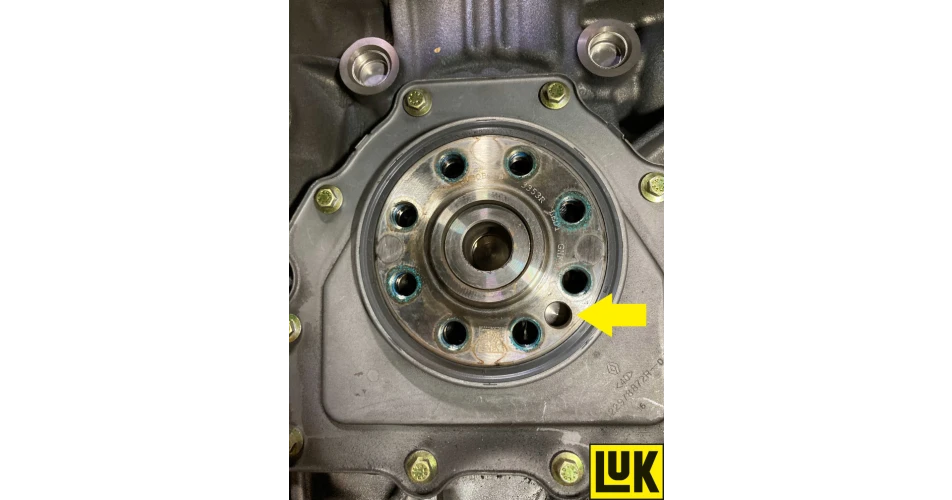 Fig 2
Fig 2
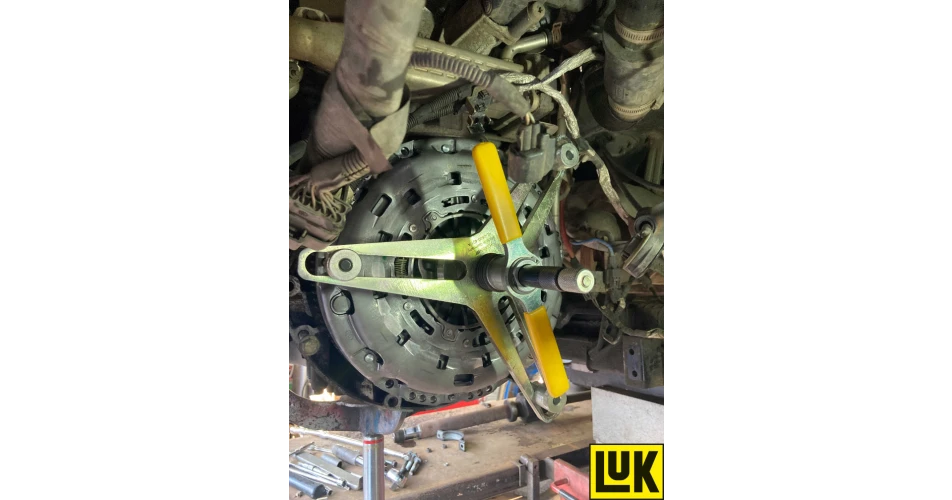 Fig 3
Fig 3
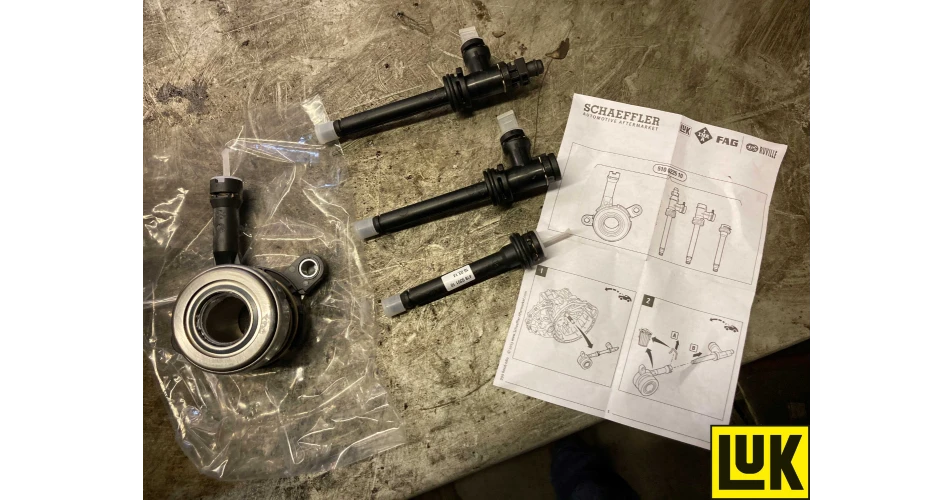 Fig 4
Fig 4
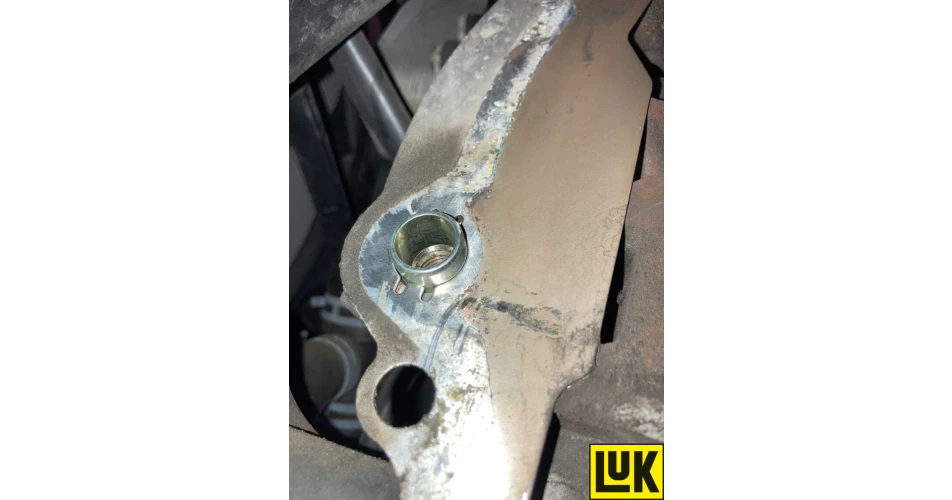 Fig 5
Fig 5


