Wheel bearing replacement is a relatively common task, but there is still some confusion among technicians between the different wheel bearing technologies and their fitting procedures. In this Tech Tip, Dayco provides a step-by-step guide to correctly install the front and rear wheel bearings on the popular 2018 VW Golf Mark VII.
Starting with the front axle, first loosen the centre driveshaft fastening by removing the wheel and its centre emblem, refitting it and lowering the vehicle back to the ground. Once loosened, raise the vehicle, remove the wheel again and disconnect the brake wear sensor cable and detach the brake caliper, securing it to a suitable part of the suspension where it is out of the way, but doesn’t put strain on its hydraulic hose.
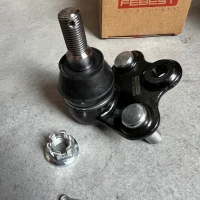
Undo the retaining screws on the brake disc and remove the disc in order to access the three nuts on the suspension arm (Figure 1) and remove the driveshaft joint. Undo the ABS sensor cable and the three bolts on the bearing assembly and, as this is a Generation 3 bearing, simply remove it from its housing.
Clean the bearing housing and remove any oxidation, then lubricate the cleaned surface, but before installing the new wheel bearing (Dayco part number KWD1021), check that the magnetic sensor ring is intact through the indication bars on Dayco Tool 19 (Figure 2).
Position the new wheel bearing in the housing and hand-tighten the new bolts provided in the kit, and then tighten them to the specified torque of 70Nm plus 90. Then reattach the ABS sensor cable and tighten its Allen bolt to 8Nm.
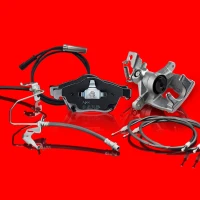
Grease the driveshaft and reposition it inside the bearing assembly, tighten the three suspension arm nuts to 55Nm and then refit the brake disc, securing the retaining screws to 8Nm, followed by the brake caliper (Figure 3), torqueing its bolts to 200Nm, and reconnecting the brake wear sensor cable.
Tighten the driveshaft bolt by hand before refitting the wheel, with its bolts also secured hand tight, and lower the vehicle to the floor to tighten the driveshaft bolt. Please note, that if the underside of the bolt is not smooth the torque value is 70Nm plus 90, whereas if its underside is smooth, the value is 200Nm plus 180.
Finally, tighten the wheel bolts to 120Nm and refit the wheel’s centre emblem.
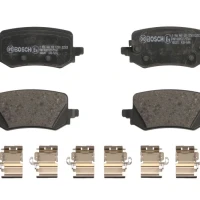
The rear wheel bearing is a Generation 2 design, secured by a single central bolt in the axle shaft. After removing the wheel and then the brake caliper, securing it out of the way without put strain on the hydraulic hose, unscrew the brake disc retaining screws and take off the disc (Figure 4).
Remove the metal cap that protects the axle shaft bolt and, without the use of an impact wrench, unscrew it and then take off the wheel bearing.
After cleaning the surfaces and greasing the spindle, carefully position the new wheel bearing from (Dayco kit KWD1002), and hand-tighten the new axle shaft bolt also supplied in the kit, before tightening it with a hand wrench to 200Nm plus 90 (Figure 5) and fitting the new dust cap, which is supplied with the kit.
Reposition the brake disc and secure the screws to 8Nm, followed by the brake caliper, torqueing its bolts to 90Nm plus 90, before refitting the wheel and tightening the wheel bolts to 120Nm.
Carry out a road test to ensure the job has been completed successfully, that the braking system is working effectively and that no ABS warning lights show an alert message on the dashboard.
Please note, whenever replacing wheel bearings, the vehicle manufacturer’s specified torque values must be applied to all the relevant fixings and always replace any bolts that are for one use only.
For more information regarding the OE quality power transmission products in the Dayco range, please email info.uk@dayco.com or visit www.daycoaftermarket.com.
To read more of this technical article or download the entire article click
here. There are lots more Tech Tips to view, and they are all searchable, on
TechTips.ie.
 Figure 1
 Figure 2
 Figure 3
 Figure 4
 Figure 5